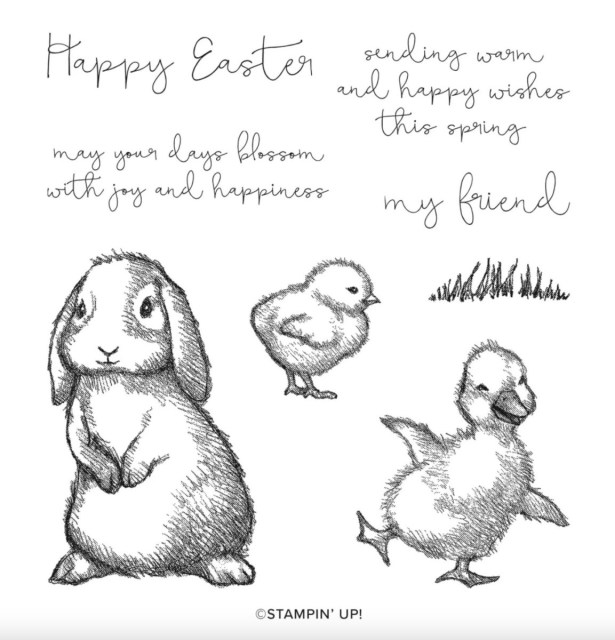
The fuzzy animal images in the Easter Friends Stamp Set are so adorable! This is a stamp set I had to have in my collection for sure.
I paired the cute bunny image with the beautiful, exclusive Simply Marbleous Designer Paper (available only through the end of this month…for three more days) to make these sweet Top Flap fun-fold cards! (Click here for details on how to earn this free pack.)
Products I used… See below for a complete list of products linked to where you can find them in my online store.
Measurements
Basic Gray Cardstock
4-1/4” x 5-1/2”
2-3/4 x a little over 4-1/2″
Simply Marbleous Designer Paper
4″ x 6″ then cut to…
4” x 5-1/4”
3/4″ x 4
Basic White Cardstock
2-1/2” x 5” scored in at the top 1/2″
2-1/2″ x 3-1/2″
Ribbon
9″
Directions
Stamp the bunny on the larger white piece (towards the bottom away from the score line). Fold along the score line and connect & adhere this folded part over the top edge of the larger designer paper piece.
Add this all to the Basic Gray card base piece.
Now add the small designer paper strip across the top of the white section. Trim off the excess.
Add the ribbon – wrap it around the white section and tie it in a knot. Trim the ends and adjust if necessary so it’s positioned right around the bottom of the designer paper.
Stamp the sentiment on the smaller white and add to the inside positioned just under the flap. (I held the two together feeling the bottom and side edges aligned and then slowly brought it down closing the card and connecting the smaller white in place at the same time.
Add adhesive under the white flap. Tuck the smaller Basic Gray piece under the flap and adhere to mat the flap.
Color the bunny’s nose with the pink color of your choice. You could certainly add much more color to your bunny, but I made almost 40 of these cards. So I figured a white bunny was just as adorable.
And because Stampin’ Up!’s designer paper is double-sided, you can choose to have the swirly, satiny side up or the marbled pattern. What would be your choice?
If are aren’t doing so already, I invite you to subscribe to my blog. This way you’ll get emails 3-4 times a week…each time I share new, creative ideas. Click here to subscribe. Thanks for stopping by to see what I had to share today.
Looking for products to help organize your crafting space? I’m a big fan of Stamp-n-Storage. I have several of their pieces in my space and LOVE them!
To celebrate the completion of their 8 Weeks to an Organized Craft Space challenge, everything at Stamp-n-Storage is 10% off today through Monday, February 28 with the code: COMPLETED8
Click here to shop my online store. Click here to access & view the current catalogs. Click here to shop My Favorite Extras. Click here to subscribe to those fun Paper Pumpkin kits of creativity! Click here to learn about my Loyalty Rewards program. You can earn free stamps just for shopping with me! Click here to learn more about joining my Stampers With ART community. Get the MOST rewards including a discount on future products! Follow me on social media! I share regularly on Pinterest, YouTube, Instagram, my Facebook Page, and my Facebook Group! Please subscribe to my blog, too!Click here and enter your email in the blue box (above the butterfly).
WAVES OF THE OCEAN PROMOTION Discover the depths of the ocean—and your artistic abilities—with the Waves of the Ocean Collection! This coastal collection includes an inspiring set of stamps and detailed dies, both early-release products from the upcoming 2022–2023 Annual Catalog. Plus, a pack of paper made from images of hand-poured paint, blue-hued foil sheets for a sea of shine, and radiant rhinestones for a splash of sparkle—each an exclusive product you can only purchase during the promotion period! Products available March 1st. Click here for the informational flyer.
ALL TOGETHER COLLECTION With hand designs that illustrate coming together in friendship and solidarity, the All Together Collection will help you create cardmaking and paper crafting projects that reflect the people you know and love. Click here for the informational flyer. Click here to shop these products online. Click here to learn more.
EARN FREE PRODUCTS DURING SALE-A-BRATION Just three more days to earn free products by ordering, hosting, becoming a demonstrator or discount shopper, and more! Click here for the details.
WOULD YOU LIKE A TOUR? Click here to learn how you can get your hands on a virtual tour of the January-June 2022 Mini Catalog! You can earn or purchase the tour within a downloadable PDF containing photos, supply lists, and measurements for 11 featured projects, along with links to corresponding videos showing the awesomeness of several of the new products, details for the featured creative projects, and many other creative samples.
A PEEK AT MARCH’S PAPER PUMPKIN KIT From the hands and hearts of our in-house artisans comes this month’s breathtaking kit. The Beyond the Horizon Paper Pumpkin Kit includes watercolor prints and designs inspired by the beautiful nature around us and creates 9 cards—3 each of 3 designs. AND the paper pieces coordinate perfectly with the New Horizons Suite Collection in our January–June 2022 Mini Catalog. Celebrating 9 years of Paper Pumpkin & to thank subscribers, this kit also includes an extra FREE stamp set! Coordinating kit colors: Bumblebee, Calypso Coral, Evening Evergreen, Misty Moonlight (ink color included), Night of Navy, Old Olive, and Pale Papaya If you are not a Paper Pumpkin subscriber, I invite you to give it a try. CLICK HERE to learn more. CLICK HERE to sign up by March 10th for this next kit.
ALL STAR TUTORIALS I’m a designer with the All Stars, a group of globally recognized Stampin’ Up! demonstrators. And we are excited to share exclusively with our customers, paper crafting friends & team members our bundle of twelve February 2022 Artfully Composed Suite Tutorials which are now available! CLICK HEREfor more information. Click here to get to my Tutorials for Sale page to see the others that have been offered. The next one featuring the upcoming new Abstract Beauty Suite will be available March 1st! AND all these tutorial bundles include links to instructional videos!
KITS COLLECTION BY STAMPIN’ UP!® Creativity made easy! A line of affordably priced, versatile all-inclusive kits. Click here for a short promotional video. Click here for more details. Click here to shop.
Do you ever look at card sketches to get the creative juices flowing? Our Stampers With ART Stars group creates around card sketches quite often. This sketch by Maureen Plut is the latest one that inspired us.
I find many sketches just by doing a “Google” search. I also love to save them on my Pinterest board.
I just showed live on YouTube about an hour ago how I used this simple card sketch to create a couple pretty cards with the Flowering Fields Designer Paper, the Tulip Fields Stamp Set, the Layering Circle Dies, the Bough Punch, and the Special Moments Sale-a-Bration Stamp Set. And now I’m sharing that video here in my blog post. Be sure to watch the video by clicking here (or you can just click on this image below if you are already on my blog post), scroll through the close-up photos that follow, check out the measurements & products list below, and then let me know if you have any questions.
I hope you enjoyed what I shared in this video. Below are measurements, close-up photos, and a product list for what I demonstrated. (Please subscribe to my YouTube channel so you can get updates when I share and go live).
Scroll further down to see other cards made by fellow Stampin’ Up! demonstrators based on this sketch. It’s so fun to see all the ways that this sketch can be interpreted.
Products I used… See below for a complete list of products linked to where you can find them in my online store.
Click here to access and download a printable “measurements & supplies” sheet.
Measurements…
Pool Party Cardstock
4-1/4” x 11” scored parallel to short end at 5-1/2” (10.5 cm x 29.7 cm scored parallel to short end at 14.8 cm)
Basic White Cardstock
4” x 5-1/4” (9.9 cm x 14.2 cm)
1/2” x 2-3/4” (1.3 cm x 7 cm)
Scrap for die-cutting larger circle
Flowering Fields Designer Paper
Scrap for die-cutting smaller circle
Poppy Parade Cardstock
2” x 4-1/4” (5 cm x 10.5 cm)
Granny Apple Green Cardstock
Scrap for punching bough
Garden Green Cardstock
Scrap for punching bough
Supple Shimmer Cardstock
¾” x 5-1/2″ (2 cm x 14.8”)
Here are photos of the finished Flowering Fields cards I made.
Here is the third card I made with the Friendly Hello Sale-a-Bration designer paper and stamp set.
And here are the other cards made by fellow Stampin’ Up! demonstrators in my Stampers With ART group that they based on the same sketch.
I hope you enjoyed what I shared! Oh!!…And HERE is the link to shop products from The Country Hive (mentioned in the video).
I invite you to subscribe to my YouTube channel. And then click on the bell to the right of the subscribe button and set notifications to “all” so you can get updates when I share and when I go live. My next Live will be on Wednesday, February 23 at 11 AM Central Time. I hope you can join me!
Click here to shop my online store. Click here to access & view the current catalogs. Click here to shop My Favorite Extras. Click here to subscribe to those fun Paper Pumpkin kits of creativity! Click here to learn about my Loyalty Rewards program. You can earn free stamps just for shopping with me! Click here to learn more about joining my Stampers With ART community. Get the MOST rewards including a discount on future products! Follow me on social media! I share regularly on Pinterest, YouTube, Instagram, my Facebook Page, and my Facebook Group! Please subscribe to my blog, too!Click here and enter your email in the blue box (above the butterfly).
ALL TOGETHER COLLECTION With hand designs that illustrate coming together in friendship and solidarity, the All Together Collection will help you create cardmaking and paper crafting projects that reflect the people you know and love. Click here for the informational flyer. Click here to shop these products online. Click here to learn more.
EARN FREE PRODUCTS DURING SALE-A-BRATION Earn free products by ordering, hosting, becoming a demonstrator or discount shopper, and more! Click here for the details.
WOULD YOU LIKE A TOUR? Click here to learn how you can get your hands on a virtual tour of the January-June 2022 Mini Catalog! You can earn or purchase the tour within a downloadable PDF containing photos, supply lists, and measurements for 11 featured projects, along with links to corresponding videos showing the awesomeness of several of the new products, details for the featured creative projects, and many other creative samples.
A PEEK AT MARCH’S PAPER PUMPKIN KIT From the hands and hearts of our in-house artisans comes this month’s breathtaking kit. The Beyond the Horizon Paper Pumpkin Kit includes watercolor prints and designs inspired by the beautiful nature around us and creates 9 cards—3 each of 3 designs. AND the paper pieces coordinate perfectly with the New Horizons Suite Collection in our January–June 2022 Mini Catalog. Celebrating 9 years of Paper Pumpkin & to thank subscribers, this kit also includes an extra FREE stamp set! Coordinating kit colors: Bumblebee, Calypso Coral, Evening Evergreen, Misty Moonlight (ink color included), Night of Navy, Old Olive, and Pale Papaya If you are not a Paper Pumpkin subscriber, I invite you to give it a try. CLICK HERE to learn more. CLICK HERE to sign up by March 10th for this next kit.
ALL STAR TUTORIALS I’m a designer with the All Stars, a group of globally recognized Stampin’ Up! demonstrators. And we are excited to share exclusively with our customers, paper crafting friends & team members our bundle of twelve February 2022 Artfully Composed Suite Tutorials which are now available! CLICK HEREfor more information. Click here to get to my Tutorials for Sale page to see the others that have been offered. The next one featuring the upcoming new Abstract Beauty Suite will be available March 1st! AND all these tutorial bundles include links to instructional videos!
KITS COLLECTION BY STAMPIN’ UP!® Creativity made easy! A line of affordably priced, versatile all-inclusive kits. Click here for a short promotional video. Click here for more details. Click here to shop.
I received a swap card from fellow demonstrator, Paula Nicely and featured it on my blog on April 12th. I had several requests for more details, so I decided to create a few variations of this fun fold using some of the new products and share it with all of you.
I just showed live on YouTube about an hour ago step-by-step directions for creating this Criss Cross pocket card using new products debuting in less than a week in the 2021-22 Annual Catalog: Hand-Penned Petals Stamp Set, Penned Flowers Dies, Genial Gems, and the Hand-Penned Designer Paper. And now I’m sharing that video here in my blog post. Be sure to watch the video by clicking here (or you can just click on this image below if you are already on my blog post), scroll through the close-up photos that follow, check out the measurements & products list below, and then let me know if you have any questions.
I hope you enjoyed what I shared in this video. Below are measurements, close-up photos, and a product list for what I demonstrated. (Please subscribe to my YouTube channel so you can get updates when I share and go live).
Products I used… See below for a complete list of products linked to where you can find them in my online store.
Imperial Measurements…
Coordinating Color Cardstock
Two pieces of 4-1/4” x 11” scored parallel to the short end at 5-1/2” then cut diagonally from the middle edge to an outer corner
Basic White Cardstock
3-3/4” x 5-1/8”
1” x 3-1/2”
Scrap for stamping and die-cutting floral cluster
Hand-Penned Designer Paper
4” x 5-1/4”
Flowers for Every Season White Faux Linen Ribbon
16”
Metric Measurements…
Coordinating Color Cardstock
Two pieces of 10.5 cm x 29.7 cm scored parallel to the short end at 14.8 cm then cut diagonally from the middle edge to an outer corner
Basic White Cardstock
3 cm x 13.9 cm
5 cm x 10 cm
Scrap for stamping and die-cutting floral cluster
Hand-Penned Designer Paper
9 cm x 14.2 cm
Flowers for Every Season White Faux Linen Ribbon
43 cm
And here are photos of my finished cards.
I hope you enjoyed what I shared!
I invite you to subscribe to my YouTube channel. And then click on the bell to the right of the subscribe button and set notifications to “all” so you can get updates when I share and when I go live. My next Live will be on Wednesday, May 5th at 11 AM Central Time. I hope you can join me!
CONNECT, CRAFT & COLLECT
And as I mentioned in my video, Stampin’ Up! will be gifting an extra $25 in Stampin’ Rewards to all orders that reach the $250+ mark this May 4-June 14! How fun!
You can earn rewards with a single order by purchasing yourself. Or you can have a party and collect orders from friends placing the orders altogether through a workshop order. Demonstrator orders, workshop orders, customer orders, and online orders can all qualify. The order must reach the qualifying amount with commissionable merchandise prior to shipping and tax.
Click here to shop my online store. Click here to access & view the current catalogs. Click here to shop My Favorite Extras. Click here to subscribe to those fun Paper Pumpkin kits of creativity! Click here to learn about my Loyalty Rewards program. You can earn free stamps just for shopping with me! Click here to learn more about joining my Stampers With ART community. Get the MOST rewards including a discount on future products! Follow me on social media! I share regularly on Pinterest, YouTube, Instagram, my Facebook Page, and my Facebook Group! Please subscribe to my blog, too!Click here and enter your email in the blue box (above the butterfly).
A NEW CATALOG DEBUTS MAY 4! If you do not have another demonstrator (or are not a demonstrator yourself), click here to fill out a catalog request form. If you live close enough (I am located in Andover, MN) to pick one up, contact me so we can make arrangements. By saving me on shipping costs, I will let you pick a goodie from the gift basket too.
JOIN+ STARTER KIT SPECIAL Get ready for an awesome Starter Kit special that will take place at the kick off of the new 2021-22 Annual Catalog on May 4th and continue on through the month! Click here for more details.
HEY CHICK & HEY BIRTHDAY CHICK Available February 2 – June 30, 2021 – The popular Hey Chick has returned to pair up with the Hey Birthday Chick stamp set in the current mini catalog!! And each with coordinating dies. Click here for a downloadable flyer. Click here to shop online.
CRAZY FOR BUTTERFLIES New early release and exclusive Butterfly Bouquet products are now available March 2 through May 3, 2021!! Click here for a downloadable flyer. Click here to shop online. BTW the Butterfly Bijou Designer is no longer available.
A PEEK AT MAY’S PAPER PUMPKIN KIT Step up to the plate, take a swing, and knock it out of the park! With the Batter Up! Paper Pumpkin Kit, it’s your turn to go to bat for all the people who’ve gone to bat for you. This month’s timeless kit with a “throwback” theme contains enough grand slam supplies to create nine 4-1/4″ x 5-1/2″ cards (3 of 3 designs) featuring classic colors, pinwheel and pinstripe patterns, and vintage-washed paper pieces. There’s no “batter” way to root, root, root for your home team and honor the all-stars in your life! Each kit also contains a couple sticks of the chewy staple – the official bubble gum of the MLB! Chew while you craft, slide a piece into a card, or save it for later. Click here to watch the promotional video, get more peeks at the kit, and see what the Batter Up! kit is about. Coordinating colors: Basic White, Bumblebee, Night of Navy, Pacific Point, Real Red, Smoky Slate, Soft Suede If you are not a Paper Pumpkin subscriber, I invite you to give it a try. CLICK HERE to learn more. CLICK HERE to sign up by May 10th for this next kit.
ALL STAR TUTORIALS I’m a designer with the All Stars, a group of globally recognized Stampin’ Up! demonstrators. And we are excited to share exclusively with our customers, paper crafting friends & team members our bundle of twelve April 2021 Flowering Cactus Product Medley Tutorials which are now available! CLICK HERE for more information. Click here to get to my Tutorials for Sale page to see the others that have been offered. The next one featuring the Ice-Cream Corner Suite will be available May 1st! AND these tutorial bundles (Jan-June) include links to instructional videos!
Happy Easter! Today’s card is one with simple elegance. I made it from the leftover pieces I had experimented with when I made my Sliding Lock Easter card (which I shared on March 17th). I would’ve timed this to post at the start of the day today, but I had my single-dose COVID vaccine on Friday morning which put me out of commission for awhile this weekend. I’m good now though.
Products I used… See below for a complete list of products linked to where you can find them in my online store.
Measurements
Basic White Thick Cardstock
5-1/2” x 8-1/2” scored parallel to short side at 2-1/8″ and 4-1/4”
Scrap for die-cutting flower
Pretty Peacock Cardstock
3-1/8″ x 4-3/8″
Soft Sea Foam Cardstock
3″ x 4-1/4″
Scrap for die-cutting flower
Old Olive Cardstock
Scrap for die-cutting wreath
Directions
Die-cut all pieces. Then snip a couple sets of leaves from the wreath.
Fold the card base in half at the 4-1/4″ score line. Then fold at the 2-1/8″ score line in the opposite direction to form the z-fold card base. Keeping the card base closed add the Pretty Peacock layer making sure that the adhesive to connect it to the Basic White is only on the back of the left half.
Stamp sentiment on the Soft Sea Foam layer. Then add to the Pretty Peacock layer.
Add the white flower to the front using a Dimensional. Add the light green flower to the inside using a couple Glue Dots. Add leaves using Glue Dots.
Embellish flower centers with sequins.
The weather has been warming up here. And having the sun shine longer throughout the days definitely makes those of us in Minnesota excited. Everyone is wearing summer clothes even on days where there is a slight chill in the air. Lots of people are taking walks or getting out on their bikes. And grilled food is a common weekend smell.
A couple fun things are on the horizon for me: the Stampin’ Up!® incentive trip to Maui in May (I’m bringing my husband AND my boys – we are all so excited!) and my $1,000,000 Sales Milestone (total career sales) that will happen any day now! I earned (will earn) both of these because of you! And I thank you all from the bottom of my heart.
Enjoy the rest of your day. I’m going to sign off because it’s time to make our Easter dinner.
Click here to shop my online store. Click here to access & view the current catalogs. Click here to shop My Favorite Extras. Click here to subscribe to those fun Paper Pumpkin kits of creativity! Click here to learn about my Loyalty Rewards program. You can earn free stamps just for shopping with me! Click here to learn more about joining my Stampers With ART community. Get the MOST rewards including a discount on future products! Follow me on social media! I share regularly on Pinterest, YouTube, Instagram, my Facebook Page, and my Facebook Group! Please subscribe to my blog, too!Click here and enter your email in the blue box (above the butterfly).
A NEW CATALOG IS AROUND THE CORNER If you do not have another demonstrator (or are not a demonstrator yourself), click here to fill out a catalog request form. If you live close enough (I am located in Andover, MN) to pick one up, contact me so we can make arrangements. By saving me on shipping costs, I will let you pick a goodie from the gift basket too.
HEY CHICK & HEY BIRTHDAY CHICK Available February 2 – June 30, 2021 – The popular Hey Chick has returned to pair up with the Hey Birthday Chick stamp set in the current mini catalog!! And each with coordinating dies. Click here for a downloadable flyer. Click here to shop online.
CRAZY FOR BUTTERFLIES New early release and exclusive Butterfly Bouquet products are now available March 2 through May 3, 2021!! Click here for a downloadable flyer. Click here to shop online. BTW the Butterfly Bijou Designer is no longer available.
PPX CREW EXCLUSIVE TUTORIALS If your Paper Pumpkin subscription is through me, you’ll now be able to enjoy exclusive ideas shared in video tutorials from the creative Stampin’ Up! demonstrators on the PPX Crew!
A PEEK AT APRIL’S PAPER PUMPKIN KIT What makes the April Paper Pumpkin kit So Cool? This vivid, summer-inspired kit includes two full sticker sheets and all supplies needed to make 12 fun-shaped cards —6 popsicles and 6 blank semicircles to color—with matching envelopes. But, even more cool: it’s the first Paper Pumpkin kit designed with kids in mind! But So Cool by Paper Pumpkin is the fresh, fun taste of summer EVERYONE of all ages will want to savor. Kit includes card bases, 2 full sticker sheets, decorative die-cut pieces, embellishments, and more. Click here to see the So Cool introductory video to make you drool even more! Coordinating colors: Blackberry Bliss, Bermuda Bay, Bumblebee, Cinnamon Cider, Old Olive, Terracotta Tile. Coordinates with the Ice Cream Corner Suite from our January–June 2021 Mini Catalog. Envelope size: 4-1/2″ x 5-3/4″ If you are not a Paper Pumpkin subscriber, I invite you to give it a try. CLICK HERE to learn more. CLICK HERE to sign up by April 10th for this next kit.
ALL STAR TUTORIALS I’m a designer with the All Stars, a group of globally recognized Stampin’ Up! demonstrators. And we are excited to share exclusively with our customers, paper crafting friends & team members our bundle of twelve April 2021 Flowering Cactus Product Medley Tutorials which are now available! CLICK HERE for more information. Click here to get to my Tutorials for Sale page to see the others that have been offered. The next one featuring the Ice-Cream Corner Suite will be available May 1st! AND these tutorial bundles (Jan-June) include links to instructional videos!
To celebrate St. Patrick’s Day, I’ve got a project with lots of green!
I was very inspired when I came across a special card on Pinterest made by Chris Slogar. So I visited her December 17,2020 blog post and learned how to make this special card that she titled the “Sliding Lock” card. I started making my own variations and recently put together an Easter-themed version that I’m excited to share with you today using this same sliding lock mechanism. It features the Arrange a Wreath Stamp Set, Forever Greenery Designer Paper, Wreath Builder Dies, the soon-to-be retiring 2019-21 In Color, Pretty Peacock (a favorite green that will be missed by many).
I just showed live on YouTube about an hour ago step-by-step directions for creating this amazing interactive card. And now I’m sharing that video here in my blog post. Be sure to watch the video by clicking here (or you can just click on this image below if you are already on my blog post), scroll through the close-up photos that follow, check out the measurements & products list below, and then let me know if you have any questions.
I hope you enjoyed what I shared in this video. Below are measurements, close-up photos, and a product list for what I demonstrated. A big thanks again to Chris! (Please subscribe to my YouTube channel so you can get updates when I share and go live).
Products I used… See below for a complete list of products linked to where you can find them in my online store.
Imperial Measurements …
Pretty Peacock Cardstock
5-1/2” x 10-1/2” scored parallel to the short end at < 4-1/4” and 8-1/2”
2-1/4” Circle
Scrap for die-cutting flower
Basic White Thick Cardstock
2-1/4” Circle
Scrap for die-cutting flower
Soft Sea Foam Cardstock
4” x 5-1/4”
Old Olive Cardstock
Scrap for die-cutting a few sets of leaves
Forever Greenery Designer Paper
4” x 5-1/4”
1-3/4” x 5-1/4″ (marked at ¾” at the top and then cut diagonally)
Metric Measurements …
Pretty Peacock Cardstock
8 cm x 26 cm scored parallel to the short end at 10.4 cm and 21 cm
2-1/4” Circle
Scrap for die-cutting flower
Basic White Thick Cardstock
2-1/4” Circle
Scrap for die-cutting flower
Soft Sea Foam Cardstock
9 cm x 14.2 cm
Old Olive Cardstock
Scrap for die-cutting a few sets of leaves
Forever Greenery Designer Paper
9 cm x 14.2 cm
4.5 cm x 14.2 cm (marked at 2 cm at the top and then cut diagonally)
Here are photos of this Easter card.
I hope you enjoyed what I shared!
I invite you to subscribe to my YouTube channel. And then click on the bell to the right of the subscribe button and set notifications to “all” so you can get updates when I share and when I go live. My next Live will be on Wednesday, March 24 at 11 AM Central Time. I hope you can join me!
By the way if you want to order Stampin’ Up! product, today may be your lucky day! 🍀 Click here for the details of today’s free shipping sale.
Click here to shop my online store. Click here to access & view the current catalogs. Click here to shop My Favorite Extras. Click here to subscribe to those fun Paper Pumpkin kits of creativity! Click here to learn about my Loyalty Rewards program. You can earn free stamps just for shopping with me! Click here to learn more about joining my Stampers With ART community. Get the MOST rewards including a discount on future products! Follow me on social media! I share regularly on Pinterest, YouTube, Instagram, my Facebook Page, and my Facebook Group! Please subscribe to my blog, too!Click here and enter your email in the blue box (above the butterfly).
HEY CHICK & HEY BIRTHDAY CHICK Available February 2 – June 30, 2021 – The popular Hey Chick has returned to pair up with the Hey Birthday Chick stamp set in the current mini catalog!! And each with coordinating dies. Click here for a downloadable flyer. Click here to shop online.
CRAZY FOR BUTTERFLIES New early release and exclusive Butterfly Bouquet products are now available March 2 through May 3, 2021!! Click here for a downloadable flyer. Click here to shop online.
PPX CREW EXCLUSIVE TUTORIALS If your Paper Pumpkin subscription is through me, you’ll now be able to enjoy exclusive ideas shared in video tutorials from the creative Stampin’ Up! demonstrators on the PPX Crew!
A PEEK AT APRIL’S PAPER PUMPKIN KIT What makes the April Paper Pumpkin kit So Cool? This vivid, summer-inspired kit includes two full sticker sheets and all supplies needed to make 12 fun-shaped cards —6 popsicles and 6 blank semicircles to color—with matching envelopes. But, even more cool: it’s the first Paper Pumpkin kit designed with kids in mind! But So Cool by Paper Pumpkin is the fresh, fun taste of summer EVERYONE of all ages will want to savor. Kit includes card bases, 2 full sticker sheets, decorative die-cut pieces, embellishments, and more. Coordinating colors: Blackberry Bliss, Bermuda Bay, Bumblebee, Cinnamon Cider, Old Olive, Terracotta Tile. Coordinates with the Ice Cream Corner Suite from our January–June 2021 Mini Catalog. Envelope size: 4-1/2″ x 5-3/4″ If you are not a Paper Pumpkin subscriber, I invite you to give it a try. CLICK HERE to learn more. CLICK HERE to sign up by April 10th for this next kit.
ALL STAR TUTORIALS I’m a designer with the All Stars, a group of globally recognized Stampin’ Up! demonstrators. And we are excited to share exclusively with our customers, paper crafting friends & team members our bundle of twelve March 2021 Hydrangea Hill Suite Tutorials which are now available! CLICK HERE for more information. Click here to get to my Tutorials for Sale page to see the others that have been offered. The next one featuring the Flowering Cactus Product Medley will be available April 1st! AND these tutorial bundles (Jan-June) include links to instructional videos!
Today I have a few more projects to share that I made with the Bouquet of Hope Paper Pumpkin kit: an Easter-themed scrapbook page, two angled easel fold cards, and cards that I’m sending off to a few of my lucky subscribers.
My creative process started out like this…
I wanted to use a gold doily as a stencil (you may have seen others doing this already). But I wanted just the floral area to get ink and nothing beyond. So I carefully placed sticky note paper pieces along the crazy edge of half the doily.
I made sure to add on a second layer to fill in any gaps between the sticky notes.
Then using a Blending Brush I added Mossy Meadow ink to the bottom edge of some Basic White Cardstock.
I had planned to make an Easter card with this 4″ x 5-1/4″ piece. But after stenciling, I realized it would be fun to use this and another like it to make a circle (rather than an oval that would be formed by the whole stencil) and turn it into a fun title piece on a scrapbook page. So I cut my Basic White into two (2-3/4″ x 4″ and 2-1/2″ x 4″) and I worked with the stencil and Blending Brush again.
I also found that after wiping away the ink from the gold foil surface of the stencil that I could reuse this as if it were untouched. The ink wiped off so easily!
So I took that now totally clean gold doily and cut a couple edges off to save as accent pieces.
Then I punched out 3 small balloons with the Balloon Bouquet Punch from the outer area of that middle section and trimmed them to look like eggs.
I punched out three more small balloons from Rococo Rose, Pear Pizzazz, and Basic White Cardstock (to make more eggs), punched and stamped a Pear Pizzazz 2-1/4″ Circle, connected my two stenciled Basic White pieces together with a strip of Rococo Rose in-between to form more of a circular wreath design, and then added the 2-1/4″ circle in the center (with a layered egg).
Next I added the gold doily edges peeking out the top and bottom, tied on some twine, and flipped this over to add Dimensionals in the four corners as shown.
And with a few more layers (measurements are below) here is what my finished page became!
To get the gold doily eggs onto the cardstock ones, I sponged on Multipurpose Liquid Glue. All eggs were added with Dimensionals to create a bit of shadow.
Extra products I used… See below for a complete list of extra products I used linked to where you can find them in my online store.
Measurements…
Hydrangea Hill Designer Paper
One 12″ x 12″ sheet
Mossy Meadow Cardstock
3-3/4″ x 3″
3-3/4″ x 8″
Three pieces that are 3-5/8″ x 5-1/2″
Basic White Cardstock
2-1/2″ x 4″
2-3/4″ x 4″
Scrap for punching a small balloon (egg)
Rococo Rose Cardstock
3-1/2″ x 3-1/2″
3/4″ x 4″
Three pieces that are 3-3/8″ x 5-1/4″
Scrap for punching a small balloon (egg)
Pear Pizzazz Cardstock
Scrap for punching a 2-1/4″ Circle
Scrap for punching a small balloon (egg)
For my angled easel cards I wanted to use the floral bouquet die-cut from the kit. But the bouquet itself was too big. So I cut it down like this so I had two usable floral borders for later.
Then I added one of the smaller floral die-cuts to the ribbon/stems section (which I had to cut down a bit more). And I prepared the other main pieces of my card.
Here are the measurements…
Extra products I used… See below for a complete list of extra products I used linked to where you can find them in my online store.
Measurements…
Basic White Cardstock
4-1/4″ x 9-3/4″ scored in from the left at 4-1/4″ and scored again diagonally from the upper left corner to the bottom right corner of that square area. (see above photo)
2-1/4″ x 3-3/8″
Rococo Rose card base from kit (or cardstock)
4-1/4″ x 5-1/2″ cut in from the left at 4-1/4″ to get two pieces
Vellum layer from the kit (flipped over for the silvery/white side)
4″ x 5-1/4″ cut in from the left at 4-1/8″ to get two pieces
Mossy Meadow Cardstock
2-7/16″ x 3-9/16″
I folded the Basic White at the vertical score line, added adhesive to just the lower diagonal section,…
…and added the Rococo Rose square to the front left area of the white card base. Then I added the other Rococo Rose strip to cover the remaining white off to the right.
I stamped and added the small bouquet to the 2-1/4″ x 3-3/8″ Basic White layer, mounted this onto the Mossy Meadow layer, and then added this to the larger of the two vellum pieces so that when the vellum pieces were lined up everything would look centered. Next I added the main vellum to the front of the card making sure any adhesive was hidden under the Mossy Meadow layer.
To get the vellum strip to stick down on the right I first put it in place and added four large rhinestones to the corners of the vellum pieces as shown.
Then I lifted the vellum strip back up, flipped it over, and added a Glue Dot behind each large rhinestone.
The last step was adding the rhinestone “stopper” and stamped sentiment to the inside. After putting the rhinestone in place, I propped up my easel and positioned another strip of cardstock so it ran parallel to the bottom edge of the easel. I then opened the card up all the way and stamped the sentiment using that strip of cardstock and the rhinestone as a guide.
And here is the finished card!
And here is one more version of this card where I used the two trimmed off bouquet edges as the stopper.
And did you see?… I also cut the b and e off the German word sticker to get the word “be.” For the word “you” I used my Stampin’ Write Marker to just ink up that word in the “sorry for your loss” kit stamp. Thanks for this idea Alanna Wharf!
One of the ways I show my appreciation for my subscribers each month is to draw five names randomly and send them a card I’ve created with the contents of the kit and some extra product of some sort. I decided to recreate one of the cards I shared on February 25th. I didn’t have many similar floral pieces left though, so I cut down another bouquet (as shown above) to finish off two of them. These are easy to make but so eye-catching.
These cards will go out in today’s mail. (To those five who were picked, sorry for the wait.)
Looking for more ideas? Be sure to check out my other fun alternate projects that I shared on February 25th. I hope I inspired your creativity with what I shared today! If you did not get this kit, I hope you can apply these ideas to products you already own.
By the way, today is the last day to sign up (or have an active subscription) for Paper Pumpkin so you get in on this month’s 8th Anniversary March kit. And if your subscription is through me, you’ll be able to enjoy exclusive ideas shared in video tutorials from myself and 5 other creative Stampin’ Up! demonstrators on the PPX Crew.
If you are not a Paper Pumpkin subscriber, please give it a try. CLICK HERE to learn more. CLICK HERE to sign up by today, March 10th for this next kit…
A PEEK AT MARCH’S PAPER PUMPKIN KIT Adventure awaits inside this month’s majestic, mountain-themed kit. With enough elements and embellishments to create eight 4-1/4″ x 5-1/2″ cards – 4 each of 2 designs – and coordinating envelopes, the Here’s to You Paper Pumpkin Kit is the perfect pick for celebrating life’s little moments and mountain-high milestones! Then to celebrate Paper Pumpkin’s eight years, this kit (which will come in a special collectible box) is ready to lead you on an excursion to explore your creativity with the bonus gift of four free stencils & stamping sponge! To embark on the adventure, prepare for the trek and watch this promotional video. Coordinating colors: Bumblebee, Calypso Coral, Old Olive, Petal Pink, Pretty Peacock, Seaside Spray
Click here to shop my online store. Click here to access & view the current catalogs. Click here to shop My Favorite Extras. Click here to subscribe to those fun Paper Pumpkin kits of creativity! Click here to learn about my Loyalty Rewards program. You can earn free stamps just for shopping with me! Click here to learn more about joining my Stampers With ART community. Get the MOST rewards including a discount on future products! Follow me on social media! I share regularly on Pinterest, YouTube, Instagram, my Facebook Page, and my Facebook Group! Please subscribe to my blog, too!Click here and enter your email in the blue box (above the butterfly).
Product List…things you might need/want in addition to the February 2021 Paper Pumpkin kit to make these projects (I listed the kit refill below because at the time I created this post, the kit refill was still available….just an option for anyone who missed out on getting the full kit with the ink and stamps)
HEY CHICK & HEY BIRTHDAY CHICK Available February 2 – June 30, 2021 – The popular Hey Chick has returned to pair up with the Hey Birthday Chick stamp set in the current mini catalog!! And each with coordinating dies. Click here for a downloadable flyer. Click here to shop online.
CRAZY FOR BUTTERFLIES New early release and exclusive Butterfly Bouquet products are now available March 2 through May 3, 2021!! Click here for a downloadable flyer. Click here to shop online.
PPX CREW EXCLUSIVE TUTORIALS If your Paper Pumpkin subscription is through me, you’ll now be able to enjoy exclusive ideas shared in video tutorials from the creative Stampin’ Up! demonstrators on the PPX Crew!
A PEEK AT MARCH’S PAPER PUMPKIN KIT Adventure awaits inside this month’s majestic, mountain-themed kit. With enough elements and embellishments to create eight 4-1/4″ x 5-1/2″ cards – 4 each of 2 designs – and coordinating envelopes, the Here’s to You Paper Pumpkin Kit is the perfect pick for celebrating life’s little moments and mountain-high milestones! Then to celebrate Paper Pumpkin’s eight years, this kit (which will come in a special collectible box) is ready to lead you on an excursion to explore your creativity with the bonus gift of four free stencils & stamping sponge! To embark on the adventure, prepare for the trek and watch this promotional video. Coordinating colors: Bumblebee, Calypso Coral, Old Olive, Petal Pink, Pretty Peacock, Seaside Spray If you are not a Paper Pumpkin subscriber, I invite you to give it a try. CLICK HERE to learn more. CLICK HERE to sign up by March 10th for this next kit.
ALL STAR TUTORIALS I’m a designer with the All Stars, a group of globally recognized Stampin’ Up! demonstrators. And we are excited to share exclusively with our customers, paper crafting friends & team members our bundle of twelve March 2021 Hydrangea Hill Suite Tutorials which are now available! CLICK HERE for more information. Click here to get to my Tutorials for Sale page to see the others that have been offered. The next one featuring the Flowering Cactus Product Medley will be available April 1st! AND these tutorial bundles (Jan-June) include links to instructional videos!
Stamp Your Art Out!
Rachel Tessman
Independent Demonstrator 763-502-6813
Current Catalogs
Get My Posts
This is the best way to enjoy all that Stampin' Up! has to offer. Plus it's fun to be on the demonstrator side of things!
Subscribe to our monthly Paper Pumpkin crafting kits through me to enjoy exclusive ideas shared in PDF tutorials from the our PP Creatives team of Stampin’ Up! demonstrators.
In the spirit of full disclosure, I am an affiliate with Stamp-n-Storage which means I may get commissions if you click on links I provide and decide to purchase anything from this company. I love their products and recommend them because I own several myself and believe my readers will benefit from them.
Archives
Categories
Recent Achievements
#5 Overall
#5 in Leadership
#11 in Sales
#4 in Team Building
2024 Incentive Trip Achiever (My 19th trip earned will be Disney World in 2025!)


")
 Designer Series Paper")


 Metallic Ribbon")
 Sheer Ribbon")
 Gorgeous Grape Sheer Ribbon")
 Glittered Organdy Ribbon")


")
 Designer Series Paper")


 Specialty Paper")


")


 Specialty Paper")


")
")


 Designer Series Paper")


")
")


 Circle Punch")


")


