Dec 24, 2016 | Family News, Many Holidays, Paper Pumpkin |
What a fun day I had yesterday. Everything about it was fabulous for me. My kiddos were on their first day of winter break, my husband had the day off, and my parents were here already (arrived yesterday).
While the kids played and everyone else either relaxed or worked on their last-minute errands and preparations for the holiday, I baked! I LOVE to cook and bake (when I have the time), and I had a blast making some special gluten-free holiday treats. When I told Luke what I was making, he asked, "So I can eat EVERYTHING?" And I happily replied, "Yes! Everything I am making and all the food we will have out for Christmas Eve YOU will get to eat!"
I won't get into it in detail right now, but we have made several changes in my son's diet since this past summer. The main change that we are sticking to for awhile (even during holidays) is eliminating gluten. And sometimes he gets pretty bummed about "being different." So it's nice when he gets to have access to anything he wants at a holiday or party.
I also took time to prep gifts for my Paper Pumpkin subscribers yesterday! So if you are one of them, be watching for some fun goodies coming in your mailbox!
The December kit is so fun and unique. And I already have several alternate project ideas that I plan to make with it and share with all of you. Of course if you are one of my personal subscribers, you will ALSO (besides the gifts I am sending out this month) get access to a collection of EXCLUSIVE ideas – ideas not shared here on my blog, in my YouTube videos or elsewhere.
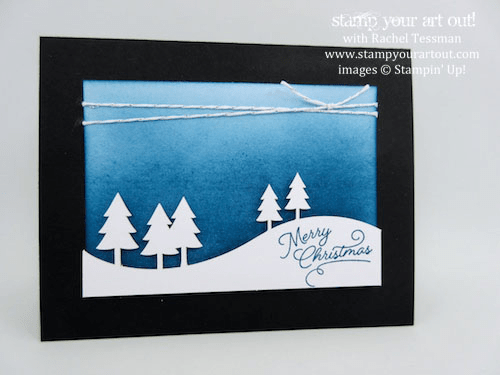
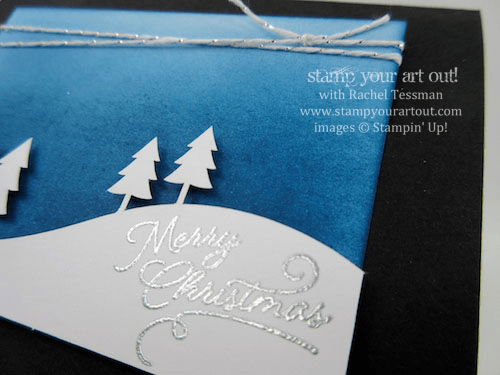
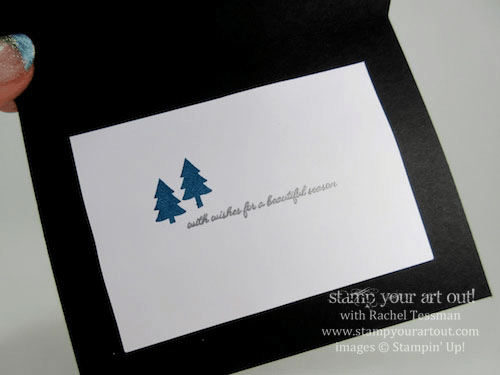
Here is a peek at one of the 10-13 ideas I'll be sharing with my personal subscribers.

These ideas go out to my subscribers on "project sheets," so they are printable. And they include the photo of the project, the supply list AND written step-by-step directions! Be sure to sign up with me as your demonstrator if you want to give Paper Pumpkin kits of creativity a try.

I don't "gift" my subscribers EVERY month. In fact the gifts are random so my subscribers never know when they are coming. But what a fun surprise when it DOES happen. My December kit subscribers are getting a sample Basic Black die-cut dragonfly image from the soon-to-be-new Detailed Dragonfly Thinlits that will be available starting January 4th in the 2017 Occasions catalog. I also enclosed a Whisper White notecard and envelope, a sheet of Silver Foil paper, a sheet of colored cardstock, and a matching set of Enamel Shapes.
In the alternate project ideas that I share here with all of you, I'll be incorporating these products into the designs somehow.

Here are a couple of the yummy gluten-free treats I baked yesterday. These are Flourless Chocolate Pumpkin Cookies. I had planned to make them for Thanksgiving and never got around to it. So I had all the ingredients and thought "why not." Well, though I really liked them, the others in the house thought they weren't sweet enough. So my mom suggested I drizzle on some powdered sugar icing (powdered sugar and a little milk mixed to the right consistency). And that did the trick!
By the way, you can't even taste the pumpkin. (I think it's like adding applesauce to a recipe as a substitute for eggs or sugar or something.)

I also made some Peppermint Crunch Popcorn. Adding the melted white chocolate was difficult, but the food critics in my house approved of the taste. So I'll be keeping THIS recipe for the future, too.

I also made some pumpkin bars and some mint bars. And this morning I plan to make fudge and maybe one or two other things…we'll see. (Sorry…no links to those recipes.)
For the future I'd LOVE to find more gluten-free and even paleo treat ideas. In fact if you have treat ideas that are gluten-free, sugar-free, and food-coloring/artificial ingredient free that are a hit with your kids, please share in the comments below. We are really trying to feed Luke as clean as possible. And though he doesn't have any food allergies, these diet changes I believe are helping him in other areas of his life right now.

Save
Save
Save
Dec 17, 2016 | Fun Folds, Many Holidays, Several Cards or Swaps |
I received two "jaw-dropping" Christmas cards this week. They are both made by members of my Stampers With ART Community. (Such fun we have sharing!)
This first one by Verla Carpenter is full of so much detail! She used a variety of products some of which I listed below, but take note that the pretty bokeh designer paper in the background won't be available until January 4th when it debuts in the Filled With Love pack in the 2017 Occasions catalog.
I keep telling Verla she needs to start a blog so she can share her beautiful creations with the world. Don't you agree? But in the meantime, I get the privilege of sharing them here on her behalf. (Do you remember her card with the hanging fushias?!)


Some of the products Verla used to make this card…
The detail is just amazing. The sponging, the layers, the pearls, the stitching…!

Even the inside is super special.

This second one by Carol Lucas is super fun! I can't wait to make more cards with this great fold! And OOOO-LA-LA…I LOVE that Candy Cane Lane paper. Unfortunately it is no longer available, so it's not in our online store anymore. It sold out pretty quickly. I'm sure you can see why. She gives credit to Dawn Griffith and this video (click here) for the idea.


Some of the products Carol used to make this card…
I am still mass-producing my 160 personal Christmas cards, but I also featured these adorable houses found in the designer paper (click here to check them out). I vote that Stampin' Up! brings this paper back and makes a new stamp set to go with it with this house image! 🙂

I hope you enjoyed these cards! Thanks for stopping by today.

Save
Save
Save
Dec 13, 2016 | 3-D Projects & Containers, Many Holidays |
My friend Lynn showed up a few days ago bearing these sweet Christmas gifts!

Sorry I don't have dimensions listed for you here this time, but you can find these cute projects at Intatwyne Designs and below are links to the tutorial videos.
Aren't these just simply adorable! Here is the Ferrero Rocher chocolates holder (with hidden gift card) made with the Cookie Cutter Christmas and Candy Cane Christmas stamp sets. (Click here to see the instructional video.)


And here is the votive candle gift packaging made with a Clear Tiny Treat Box. Super adorable! (Here is the video sharing how to make these.)


Here are a few of the supplies Lynn used to make these gifts.
Hope your preparations for the holidays are going well. Found out yesterday I'm a little behind, but with a little less sleep I'll catch up. LOL Our Christmas actually starts this weekend with my husband's side of the family, so I really need to be ready about a week sooner than most! Eek!


Click here to learn more.
Save
Save
Dec 2, 2016 | Family News, Many Holidays, Several Cards or Swaps |
Thanksgiving was never one of my favorite holidays. In fact it's often thought of by many as a holiday for eating a LOT of food. I have a touchy digestive system and I never liked turkey (stopped eating it when I was a teenager). But Thanksgiving is also a holiday for giving thanks…for counting our blessings. The older I get, the more I appreciate Thanksgiving for this reason. It gives us an excuse to reflect on and share what we are thankful for. And how thankful I am this year! My family is healthy and well, we have a good roof over our heads and healthy food to eat, and we are happy with all that we get to do and see.
We spent our Thanksgiving Day weekend up at the cabin (where my parents live) in Northern Minnesota. The weather was beautiful, a perfect temperature for getting outside to have fun.

We arrived Thursday morning and spent most of that day just preparing for the big meal. This is my mother setting the table (which was actually two tables put together so all 12 of us could sit together).

My husband and our boys braved it out and slept in the "garage room" all three nights. The garage isn't heated with a furnace. So my husband had to keep the wood burning in the stove throughout night and a couple times during each day.

Cousin Yvette was entertaining and kept us on our toes. What a joy! The boys loved playing with her during this 4 day weekend.


Sledding was a blast! I was just as into it as the kids. It's one of those sports that isn't too risky for my 48 year-old body. I'm low to the ground, so falling off doesn't hurt.
We loved getting several on a sled at once because the added weight makes for a faster ride. And the hill we go down (the private drive into the cabin) is amazingly long and curvy.

Yvette even gave it a go with her mom (my sister-in-law, Micala) this year and seemed to enjoy it!

On this ride, we connected two sleds together with a rope around my waist. LOL


On Saturday evening my boys, Luke and Nick helped their cousins, Jake and Robbie build a fort on the deck. They were able to fit all 4 inside when it was finished.

The lake isn't frozen over yet, so we didn't do any activities down there. But it was pretty to look at.

I even worked on my Christmas cards a bit on Sunday morning before packing up to leave. What a fun weekend it was!

Here is what my Christmas cards will look like this year.


Our family photo will fit inside, too. I won't attach it, but just slip it in loose.

Hopefully I'll find more time in the coming week to get them done. It would be nice to send them out early this year.

Life is good. And I am grateful.
And I don't know if I have said it enough… but thank you blog & YouTube viewers, Facebook & Pinterest followers, customers, club members, team members, fellow demonstrators, employees at Stampin' Up!, and friends and family for supporting me in this dream job of mine! I love that I get to create and share every day. And I love all the wonderful people I have met in this adventure.

Product List

Click here to learn more.
Save
Nov 24, 2016 | Many Holidays, Paper Pumpkin, Several Cards or Swaps |
Did you see my faceted box that I shared on November 21st?
Did you see my photo holiday cards that I shared yesterday?
I started playing around with another idea using the Wonderful Winterland November 2016 Paper Pumpkin kit but kept "stepping it up" – adding more and more. So I decided to share all the versions I came up with.
This is where I started. I used the contents of the kit, Basic Black cardstock, my trimmer and a sponge.

Then instead of using the Dapper Denim ink in the kit to stamp Merry Christmas, I used VersaMark ink with Silver Embossing Powder and heat embossed it with the Heat Tool in this next version.


In this 3rd version I added a layer of Silver Glimmer paper behind the sponged sky/trees layer. And I attached the sponged layer to the glimmer paper with Glue Dots.
I wouldn't recommend using just the flat glue dots that come in the kit to attach the cardstock to the glimmer paper, though. The ones in the online store are best for this. I show the difference in my video that I made with the faceted box.

On this next stepped-up version, I used the Fine Tip Glue to attach the little stars on the tree that I punched out of the Silver Glimmer Paper with the Confetti Stars Punch.


And in this last 5th version I substituted the Basic Black cardstock for Fancy Frost Specialty Designer Paper.

Because this paper is embossed, you don't want to use any sort of tool to enforce the crease. See how it flattened out the embossing here in this photo?

So the Bone Folder is out when folding this paper. Just apply gentle pressure with your hands.


Thank you for seeing what I had to share today. I wish you all a wonderful day whether you are with family and friends celebrating the Thanksgiving US holiday or whether you are spending it in some other way. Hugs to you!

Save
Nov 23, 2016 | Many Holidays, Paper Pumpkin, Tips/Techniques/Tutorials, What's NEW!? |
What a crazy & busy (but FUN) time of year it is! I had a LOT on my To-Do list for Monday and Tuesday of this week because starting today my kiddos are on a 5-day holiday break from school! In those two days I managed to create a few more ideas with the latest Paper Pumpkin kit, cut all the cardstock for my 160 personal Christmas cards, finish packaging my greeting cards that I sell at vendor/craft fair events, AND purchase most of my Christmas gifts – which REALLY amazes me since I hadn't even STARTED my gift shopping as of 3 days ago.
I'll share what I'm making for my Christmas cards in an upcoming post. You'll be impressed because this year I went with "easy." And… they are still cute! (I can't wait to share them.)
But today I want to present to you an idea you could do for YOUR Christmas cards if you are a Paper Pumpkin subscriber, just got the Wonderful Winterland November kit, love the idea of photo cards AND you still need a card design! (This is similar to the card I did for my own personal cards last year. In fact I sort of like it better.)

With only a few extra supplies…
- business size envelopes from an office supply store
- your photos
…you can make 24 photo cards with one kit!

Plus… now that the refill kit is available in the online store, you can purchase a refill to make 24 more (or two refills to make 48 more, etc.) if you are a Paper Pumpkin subscriber!
Let's say you aren't a subscriber yet and didn't get this kit. You can sign up today, purchase the refill/s in the online store and use your own stamps for the messages. (Only active subscribers can purchase refills & extra full kits from the online store – one of the many perks.)

These are super quick to make and are perfect for any vertical black & white 4×6 or true digital print.
Tips:
- Cut Basic Black cardstock to 4" x 9-1/4"
- Use at the most 6" of twine per card. (I used 5" for each.)
- Attach "scene" within the top 2 inches of the card.
- Punch stars from the leftover paper that the scenery pieces were in.
- Use these same pieces to get the skinny strips for the bottom of the cards.
- Tuck the vellum under the photo and attach using adhesive only at the very top were the vellum is tucked so it won't be seen. (Adhesive shows through vellum.)
- Stamp onto the vellum AFTER it is added to the card. Leave room for signing your card.
- Adhere the twine bow with either a rolled glue dot from the kit OR the Fine Tip Glue.
- Attach stars using the Fine Tip Glue. (I highly recommend creating and using the toothpick tool I mentioned on October 29th.)
- Don't use a printer to copy your photos if you don't know how to adjust the settings for photo quality. LOL…sorry about the streaks on my sample photos.


If you caught my last post two days ago, I shared yet another idea that you could make with this fabulous kit. Click here to check that out.
In fact because we are smack-dab in the middle of the crazy busy holiday season and we are all rushing to get things done, I am sharing my alternate Paper Pumpkin kit ideas a little differently this month. I'm sharing them as I come up with them. There is such a small window of time with this kit if you are going to make and use the kit as is. AND the ideas that I am coming up with right now for you to try are also geared around the holiday season. So I don't want to delay in getting them to you simply because I am trying to get them all into a "how-to" video that would take me probably two weeks to finish.
I'll share more ideas with this kit soon!
As I sign off to go wake up the kiddos, I want to let you know of some great sales that are going on with Stamp-n-Storage AND Stampin' Up! (We can all appreciate some savings at this time of year!)
The company that helped me transform my crafting space last December, Stamp-n-Storage is kicking off their Holiday Sales Specials today!
• FREE SHIPPING on all US Domestic orders.
• Spend $125…Save $15
• Spend $300…Save $40
• Spend $450…Save $65
• Spend $750…Save $125

Stampin' Up! is offering great deals right now too!
• 25% Off Select Stamp Sets through the end of November

• Up to 40% Off Several Products during our Online Extravaganza


Save


